-1.jpg)
Texas All-State Etude Recording - A major
Wednesday, October 28, 2020 by Jennifer Rodriguez | Uncategorized
Etude # 3 for the 2020-2021 Texas All-State band audition
Happy Practicing!

Texas All-State Etude Recording - C# minor
Thursday, October 1, 2020 by Jennifer Rodriguez | Texas All-State etudes
Here is my interpretation of the C# minor etude for the Texas All-State Band auditions.
One common question I've heard is "How fast is the tempo at measure 26?" Un poco piu mosso means a little more movement, so my answer is faster than your previous tempo. The audience should hear a definite tempo change, but keep the tempo within the character of the piece. This one is slower and in a singing manner...a sudden quick tempo is out of character. Experiment with different faster tempi while recording yourself, then listen back and choose the take you like best!
5 Factors for Improving Flute Tone
Wednesday, May 13, 2020 by Jennifer Rodriguez | Flute Fundamentals
Ever have a practice session where your tone distracts you from hearing any progress? It sounds fuzzy or airy, and any adjustments just aren’t working. I find it always helps to go back to the basics and start at the beginning. Here are 5 factors for improving flute tone.
Instrument Set-up
After a few weeks of counting and breathing exercises, it’s finally time to assemble the flute. I tell students to take the body out by holding the flute from the brand name. This helps avoid any accidental key crushing and bending should they grab the flute on the keywork.
The second piece taken out is the headjoint. I ask students not to hold the head joint by the lip plate or the crown when inserting into the body. These 2 instructions help avoid loosening the crown and keep the soldering points on the lip plate and riser intact (especially if the flute belonged to Grandma first).
Lastly (but not least-ly :) ), students attached the footjoint to the body. I instruct my students to hold the piece by the end without keys.
 Photo courtesy of Yamaha
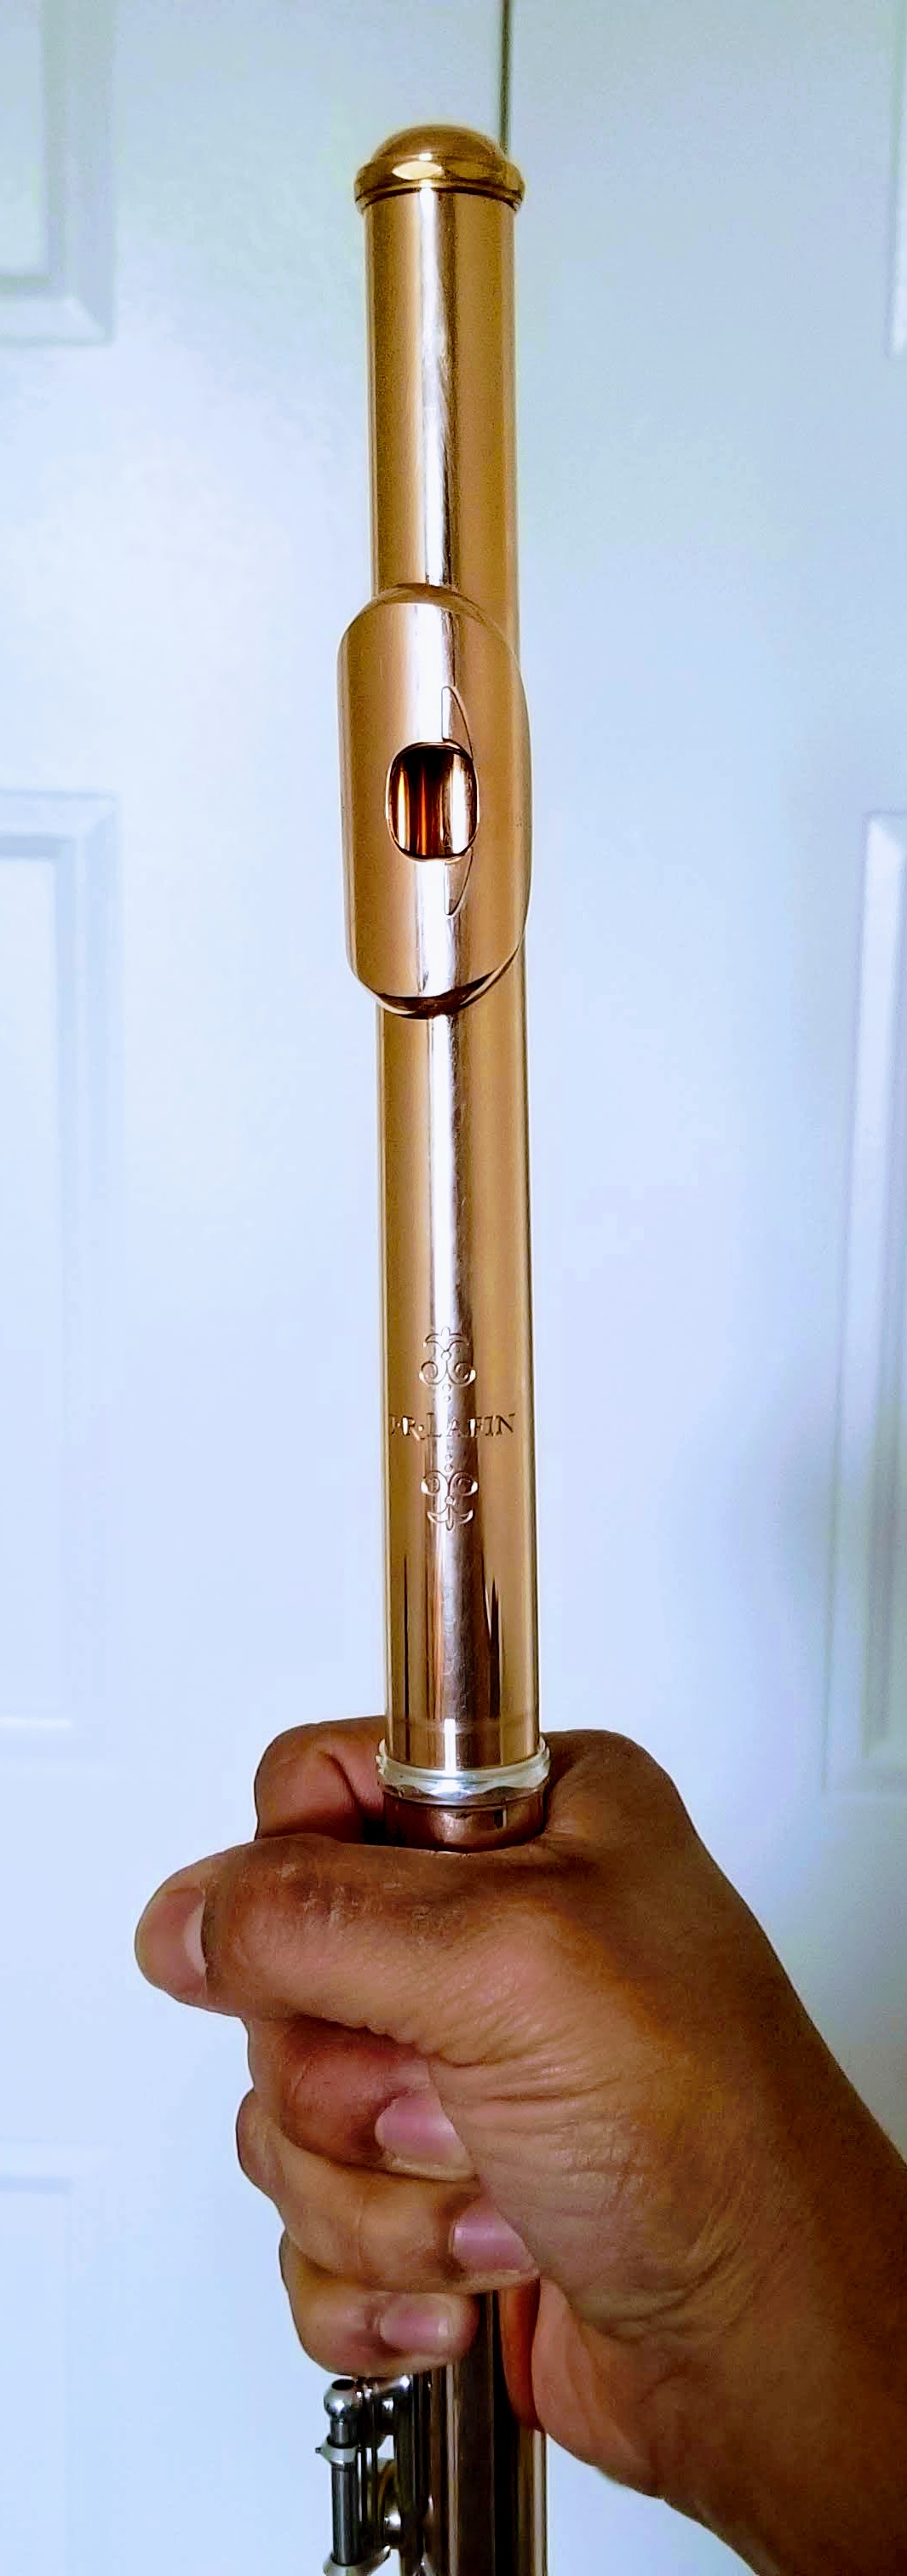
Aligning the Headjoint
I use two points on the flute for aligning the headjoint, the outside edge of the embouchure hole and the outside edge of the first key (red lines in photo below). I ask my students to point to these spots before adjusting the position of the headjoint. This is to ensure they know where to look.
I also explain to the students that the headjoint must be pulled out when playing. Then, I demonstrate the intonation differences of the note A with my headjoint pulled to different spots. Each of my students starts with their headjoint pulled out about 0.25 inches (0.6 cm).
After they align the headjoint and I check their work, I mark their flutes with two dots using nail polish. One dot is where the two pieces connect, make sure nail polish is on both pieces. Place the second dot at the edge of the headjoint tenon and align it with the first dot. The second dot is an insurance policy; it marks the alignment should the first dot peel off. It also serves as a visual cue for pulling the headjoint out.
.jpg)
Align the edge of the embouchure hole with the edge of the 1st key
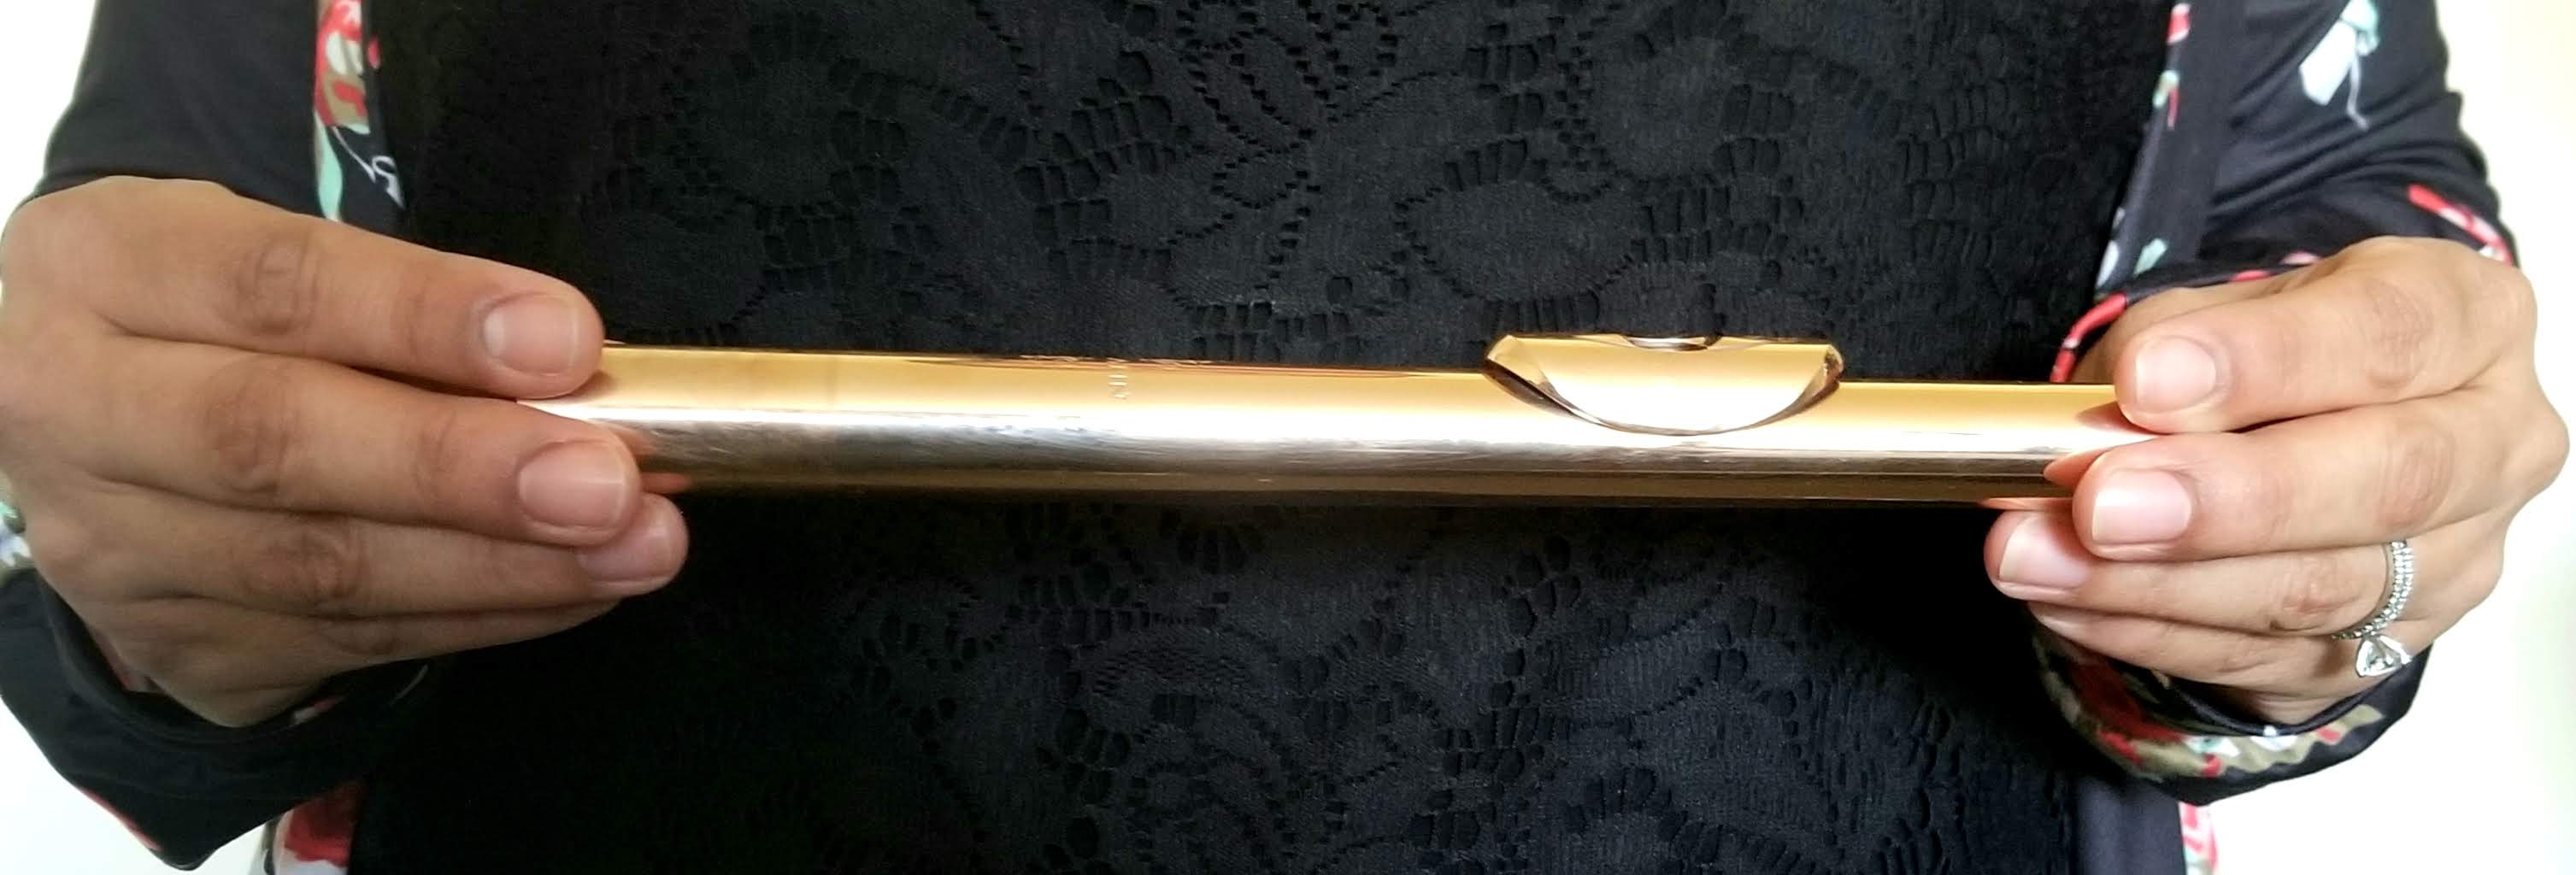
Aligning the Footjoint
Position the bar on the footjoint directly through the middle of the keys. This position works well for the majority. Slight adjustments may be needed for people with extremely long or short fingers.
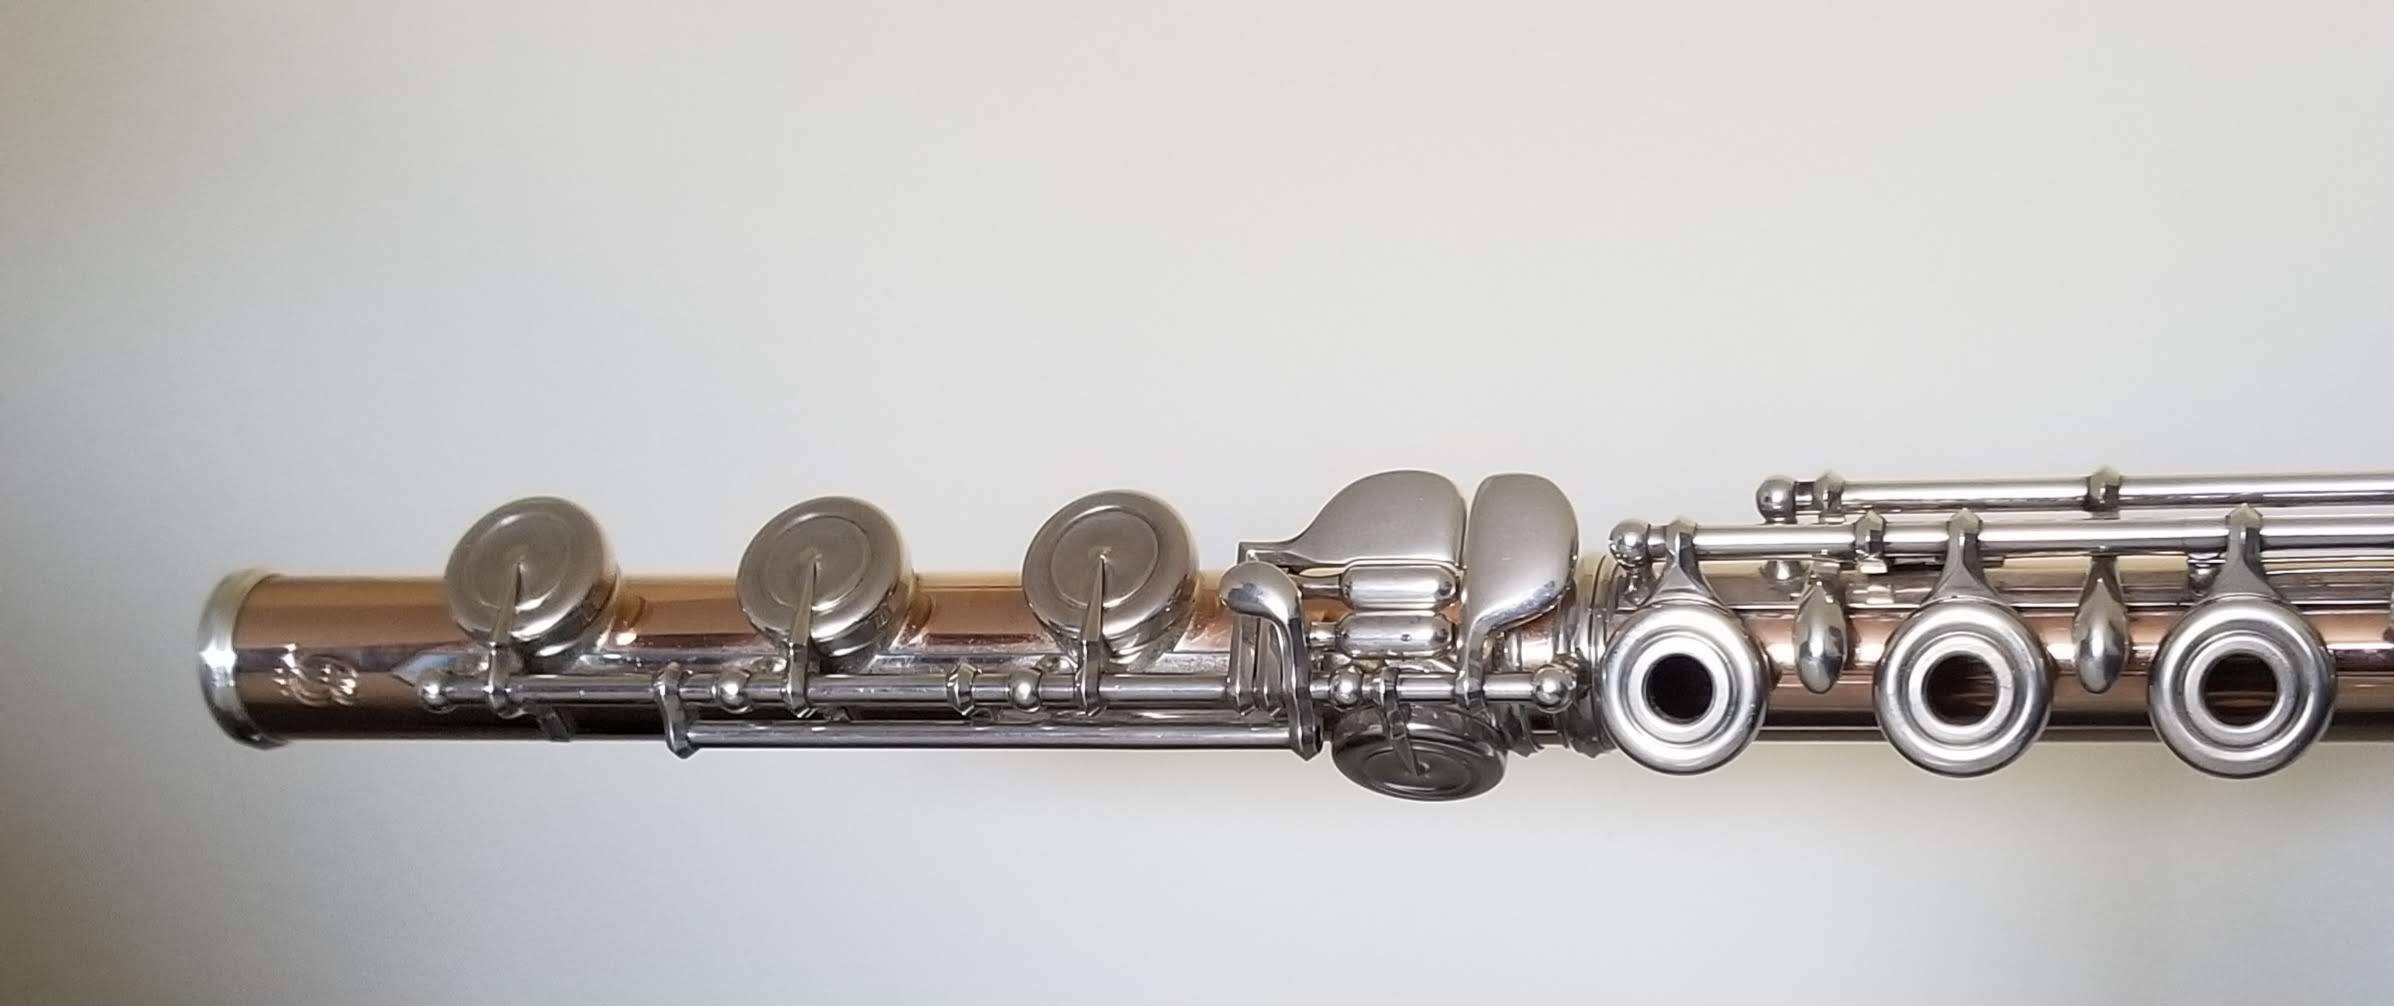 Footjoint bar aligns with the middle of the keys
Once aligned, I also mark the footjoint with a nail polish dot.
Reminders to Students
If the footjoint or headjoint are not connecting to the body easily, DO NOT use cork grease to lubricate the joints.
Many of the woodwind care kits bought by students include a tube of cork grease that looks like chapstick. Many students and parents see the word Grease and think “this will keep the parts from getting stuck.” Quite the contrary is true. Most footjoints or headjoints stick because the tenons are full of dirt and grime. Wiping them with a cleaning cloth after playing controls this easily. Once a month or so I use an Alcohol Prep Pad to clean the tenons and the embouchure hole of the headjoint.
If connecting the pieces is still a struggle after cleaning the tenons, it’s time to see a repair technician. They can make necessary adjustments to make setting up the instrument easy.
Hold the Instrument by the Brand Name.
I constantly remind students to hold their flute from the brand name. It helps avoid many accidents like crushing the keys or a flute body that slips off the headjoint and crashes to the floor!
Hand Position
When I show students how to place their fingers on the keys, I start by placing their left-hand pinky finger. I find the students end up intuitively placing the rest of the hand on the correct keys and their thumb on a spot that feels natural. If their thumb placement is causing unnecessary tension, I move it under the first finger.
For the right hand, I also start by placing the pinky finger. Almost every student I have taught will automatically place their other fingers on the closest keys (as they did with the left hand). For the first finger, I show them that they have to skip a key. Should they forget, I remind them that the first finger belongs on the fake-out key. One of my colleagues called the first key the fake-out key because it doesn’t actually cover a tone hole like the others, and I adopted the phrase.
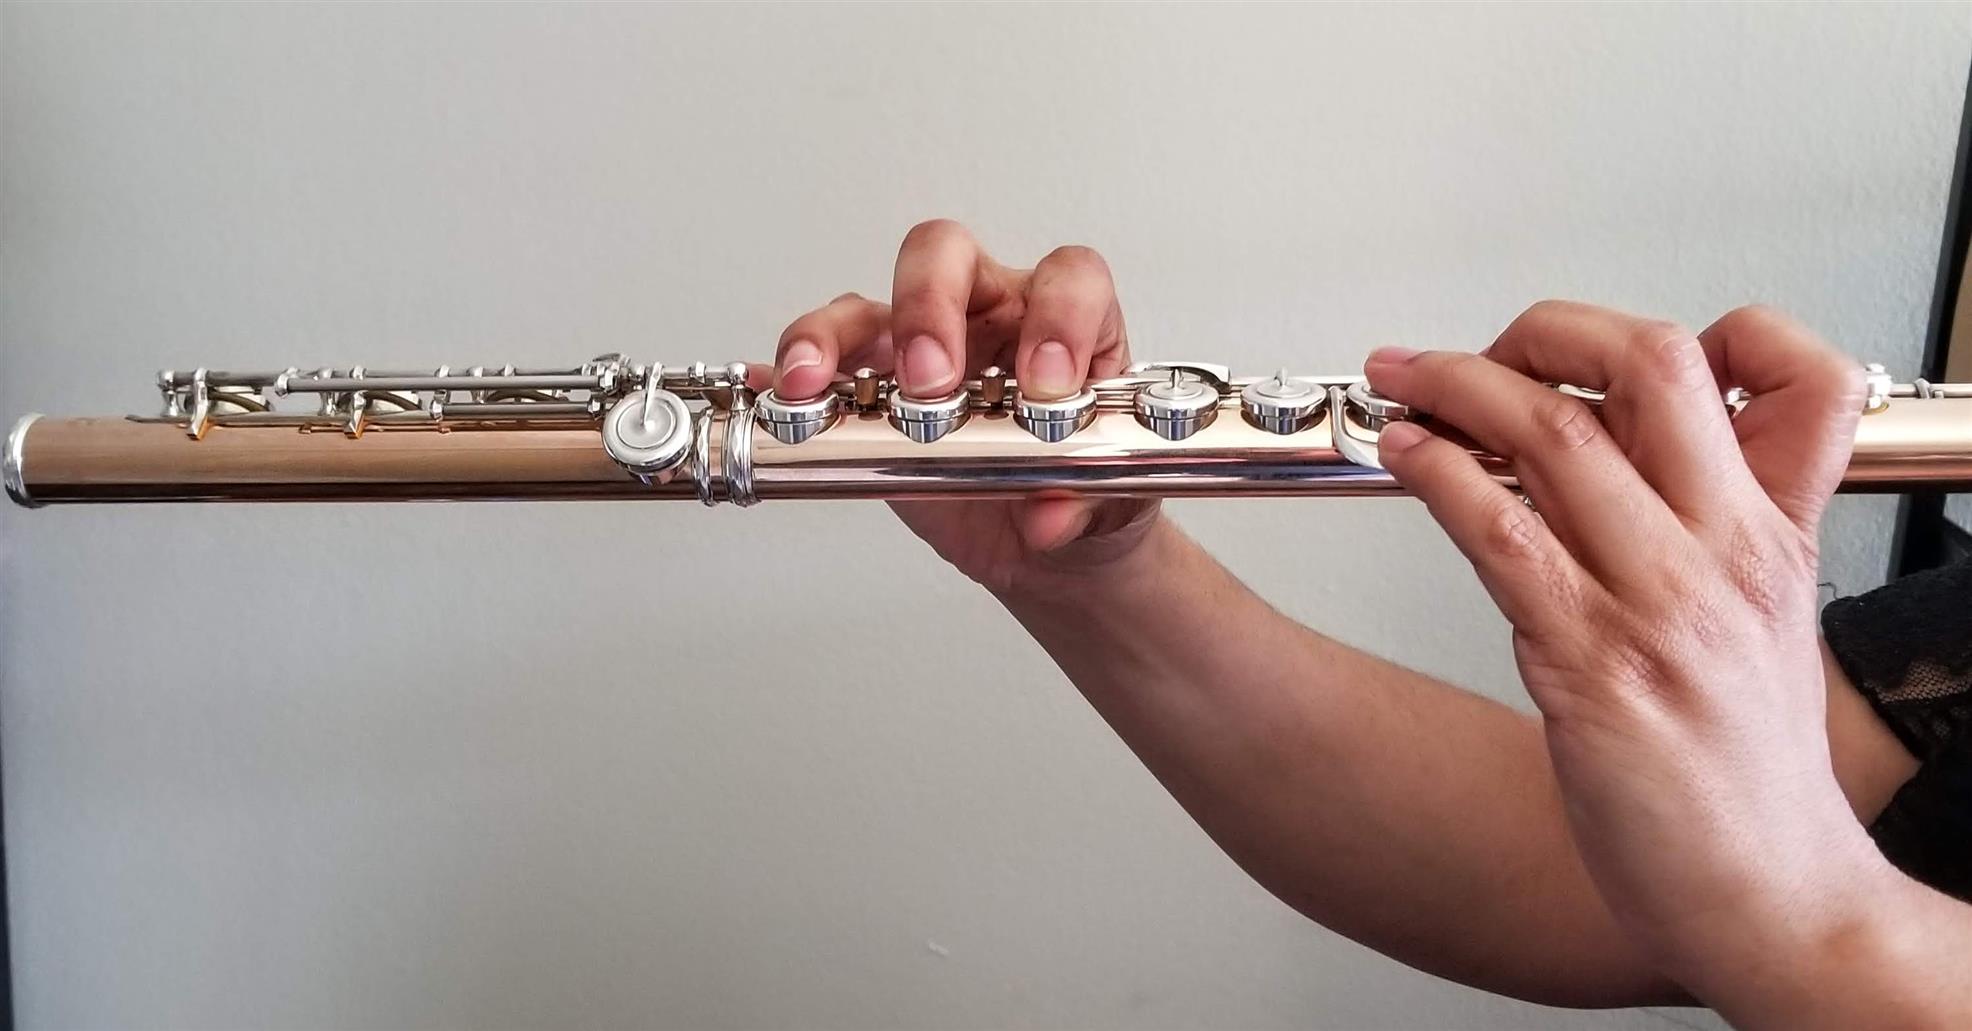
With this approach to finger position, students also need to be shown where the side of the right hand index finger balances the flute. The flute rests on the fleshy part of the index finger between the joints. This is one of the balance points for holding the flute.
There are 3 balance points for holding and stabilizing the flute...the chin, the side of the left index finger, and the right thumb. Now, you may be thinking “This is great, but what does holding my flute have to do with flute tone?” If your hands are placed in a position that holds the flute off-balance, our bodies tense to create balance. Added tension impedes our ability to breath, thus affecting tone.
Posture
When teaching playing position, I start by instructing the students to place their fingers on the keys and raise the flute so the Ab key is directly in front of them. Then, without moving the flute they turn their head to look at the embouchure hole. Last, without moving their arms sideways the students place the lip plate on their chin. Only allow forward and backward arm movement when placing the flute on the chin (it will be slight). Do not allow students to move their head forward and meet the flute.
I first heard these instructions on a Play with a Pro clip featuring Emmanuel Pahud entitled Flute Position and Embouchure and find them both practical and efficient.
Sitting
Use a chair with a straight back. My favorite are these Wenger chairs. Contrary to every middle school band director I’ve worked with, I encourage my students (especially beginners) to sit with their entire back touching the chair. <gasp> Before you start chasing me with pitchforks and calling me a blasphemer, hear me out. I do this for two reasons: With the entire back on the chair, slouching does not happen. Secondly, the flutist instantly feels overarching of the back, a common habit created when taking a big, deep breath. Both slouching and overarching affect breathing and tone production.
I do understand the benefits of sitting at the edge of the seat...uniformity, keeping tradition, it’s a classroom management tool, and keeping students focused. In terms of improving flute tone, I find sitting back gives students much needed feedback. Perhaps alternating between back on the chair and edge of the seat position as outlined below is the answer.
Where do I sit?
|
Entire Back on the Seat
|
Edge of the Seat
|
|
First 1 - 4 weeks of playing
|
1 - 2 weeks prior to a performance
|
|
Learning the higher octave
|
1 - 2 weeks after mastering a concept
|
|
Working to increase breath capacity
|
At performances
|
Sitting with both feet flat on the floor is also important for balance and stability. If your student’s feet do not reach the floor, place their empty case or a block underneath their feet.
Standing
I’m from Texas so marching band posture dominates. This is the worst for flutists. I find it best to stand with feet hip width apart, evenly distributing your weight. At times, I tell my students to place the weight in their heels because that forward (on the toes posture) is so ingrained.
Position the music stand on the left side for both sitting and standing. This keeps students from twisting their body to look at the music. I recommend that flutists use their own stand, but if this is not possible, adjust the chair angle so the stand is to the left of both players.
Breathing
When filling the lungs with air, they expand through the front, back, and sides (360°). Most students intuitively expand through the front (and maybe the sides) of their body, but the back is usually crushed by overarching. This is where sitting at the back of the chair comes in. Every time a student takes a breath, I want them to feel expansion on all sides. When the back expands it will push against the back of the chair. If they cannot feel the chair when taking a deep breath, they are likely crushing and not maximizing their breath capacity.
Now, let’s talk about how to blow out. Afterall, this is how sound is made on flute. Ideally, a flutist breathes in and blows out immediately without holding the breath; air is in constant motion. One of my band directors always said, “Fast air in, fast air out.” But what if our support system is actually slowing the air out?
I have my students perform the following exercise to show them how using certain muscles to support the sound effects the sound. It starts with a sentence, “Hello my name is __________.” The first time they say this sentence I ask them to engage their ab muscles (as if they were going to perform a sit-up. When repeating the sentence, I tell them to engage the muscles at the belly button and below. Finally, I ask them to describe the differences. Here are some of the leading questions I ask:
- Which way felt easier to speak?
- Did you feel out of breath/straining for breath with one?
- Which sentence was louder?
- Which way feels easier to maintain?
Many students engage their upper abs when told to support or engage their core, but for flutists this actually slows the air speed and makes breathing in more difficult. Our support system is lower in the body (belly button and below) for a full tone.
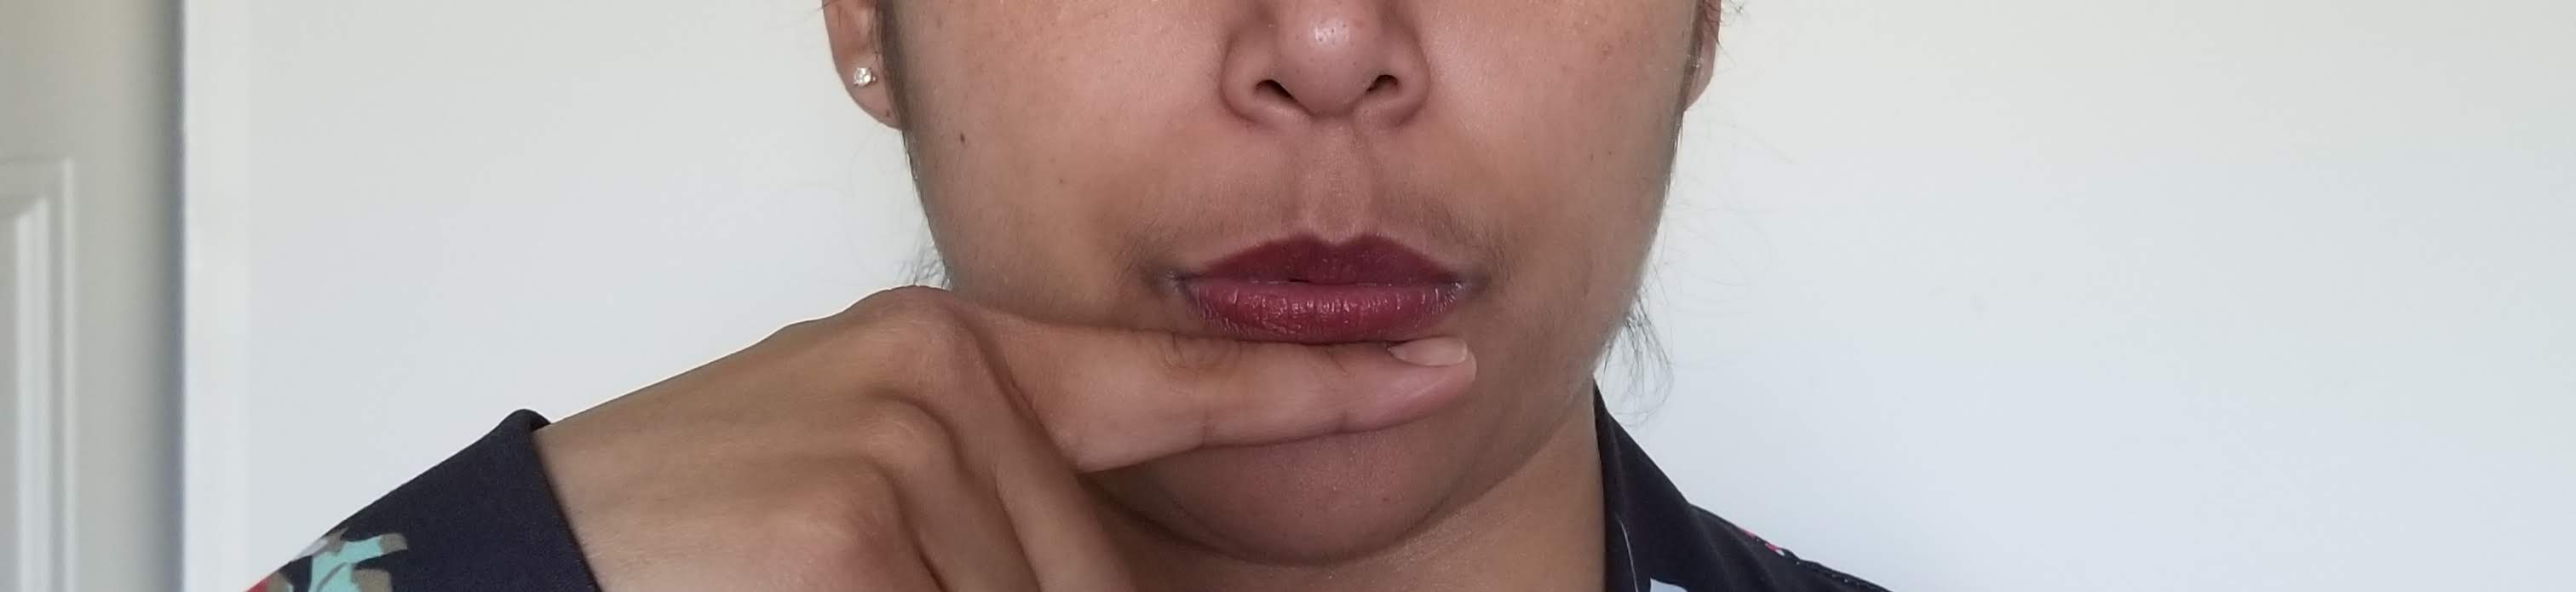
Embouchure
Aligning the aperture with the embouchure hole of the instrument is paramount for full tone. When teaching embouchure, I start by having the student place a finger in the curve of their chin. Next, I tell them, “Blow as if you are cooling a bowl of soup.” Most will form their natural flute embouchure by mirroring my example of cooling the bowl of soup.
 Finger under the lip to simulate a headjoint
After creating the embouchure with a finger on their chin, it’s time to use the headjoint. My instructions are as follows:
Hold the headjoint with one hand on each side.
Place the lip plate where your finger was...in the curve of your chin.
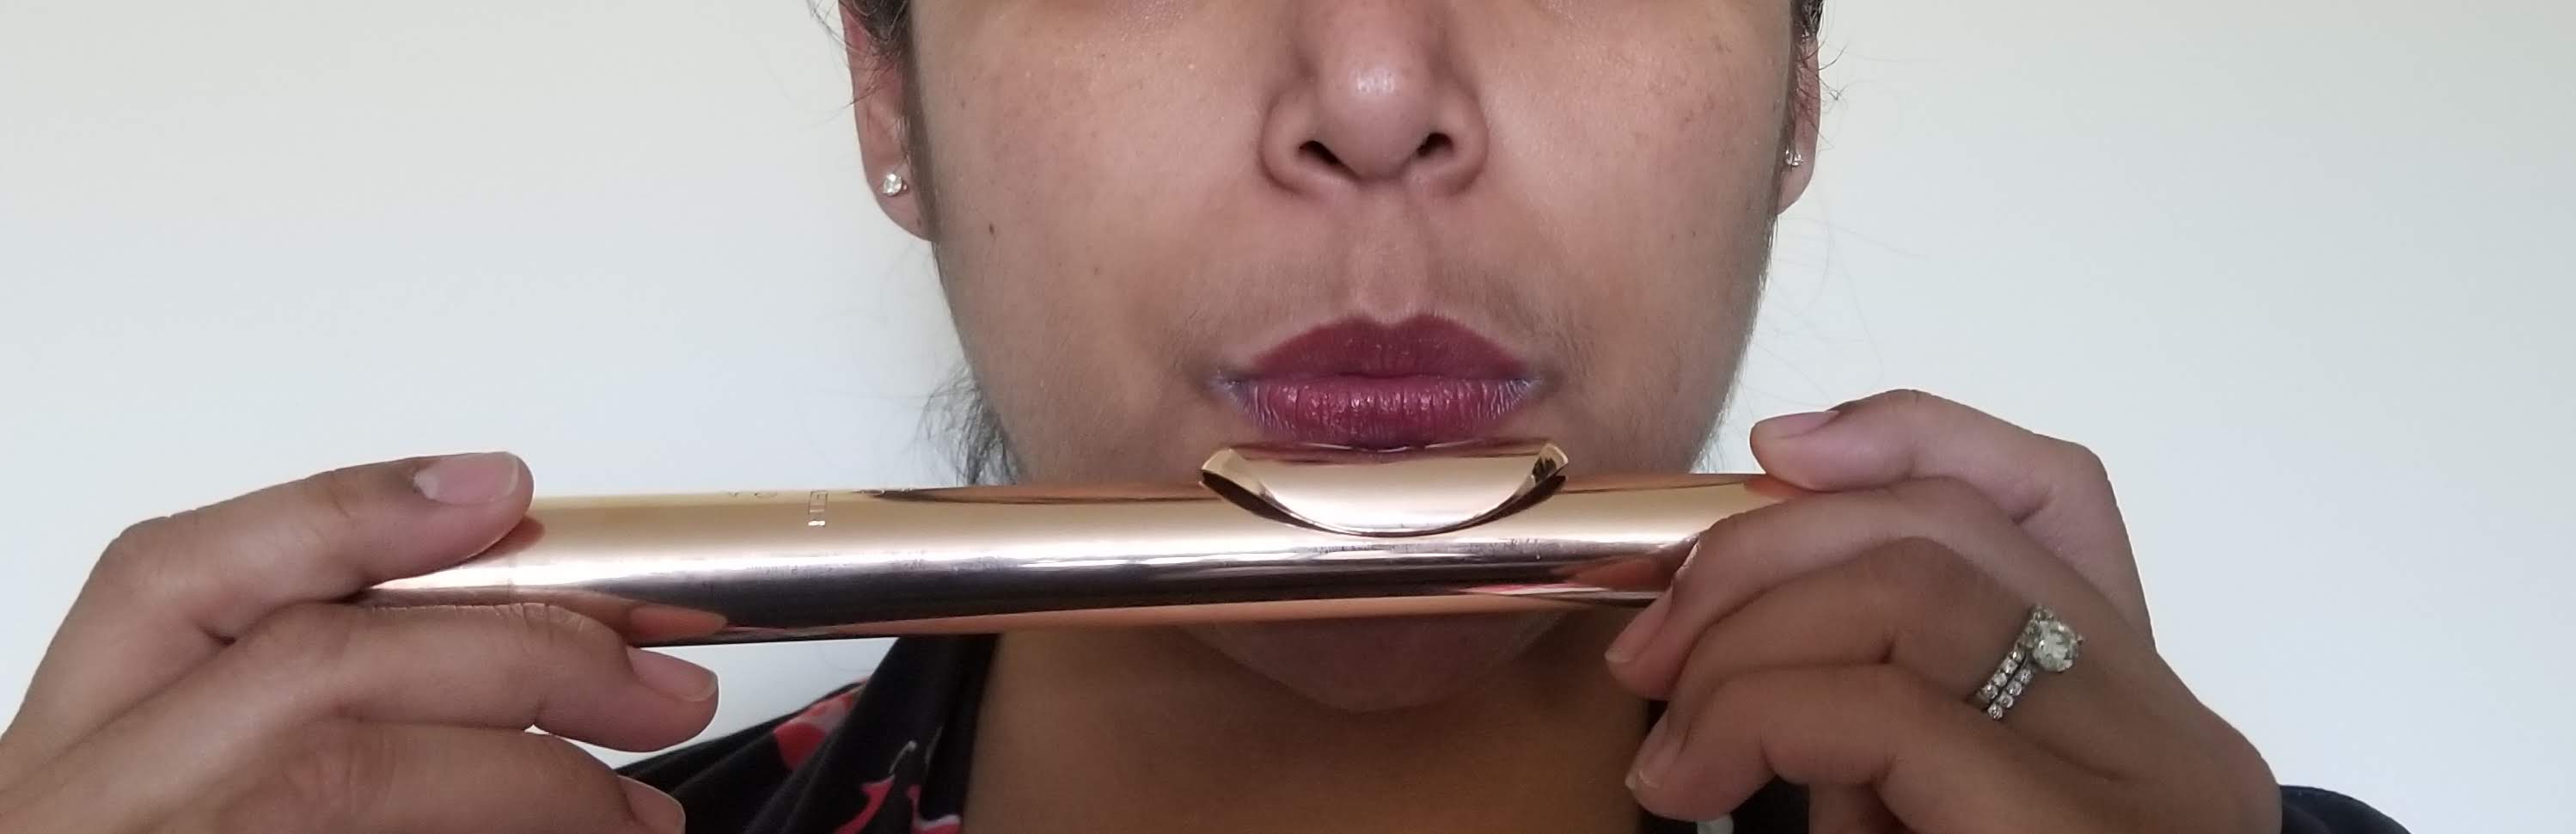
Now take a deep breath and cool your bowl of soup.
Most will not make a sound because the air isn’t moving fast enough, but they will hear a wind sound through the tube. To increase the air speed, I tell the student to imagine the bowl is a foot deep and their air must cool the soup at the bottom of the bowl.
So, the next time you're having a bad tone day go back to the basics!
